A temperature and humidity meter is a remarkable innovation that allows you to determine temperature and humidity levels. These measurements can be used to control the operation of other devices, displayed on screens, and have other positive applications. In this post, we will learn how to build a temperature and humidity meter using an Arduino and a DHT sensor, and display the measurements on the LCD 16×2.
Electronic components that we need:
- Arduino UNO
- Breadboard
- DHT Sensor (Temperature and Humidity Sensor)
- LCD 16×2 + I2C
- Electrical wires
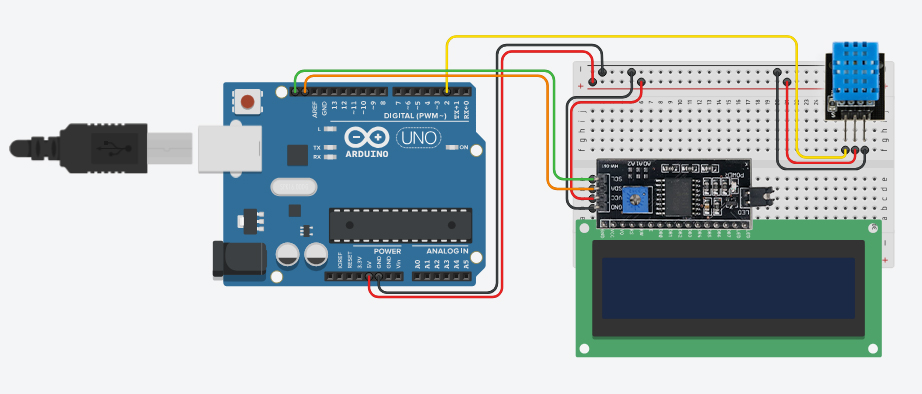
Circuit diagram:
Programming Code:
#include <DHT.h>
#include <LiquidCrystal_I2C.h>
//by www.andprof.com
DHT dht(2, DHT11);
LiquidCrystal_I2C lcd(0x27, 16, 2); //0x27 or 0x3F

int temp;
int humidity;

void setup() {
  // put your setup code here, to run once:
dht.begin();
lcd.init();
lcd.backlight();
}

void loop() {
  // put your main code here, to run repeatedly:
delay(2000);
temp = dht.readTemperature();
humidity = dht.readHumidity();

lcd.setCursor(0,0);
lcd.print("Temp: ");
lcd.print(temp);
lcd.print(" C");

lcd.setCursor(0,1);
lcd.print("Humidity: ");
lcd.print(humidity);
lcd.print(" %");

}
Explanatory video: