The clap switch is a unique Arduino project, that allows remote control of devices by clapping or a voice signal. This switch is used in a wide range of electronic devices. In this post, we will learn How to make clap switch with Arduino, using an audible signal or clapping.
Electronic components that we need:
- Arduino UNO
- Breadboard
- Sound Sensor
- 1 LED lights
- 1 resistor 220 Ohm
- Electrical wires
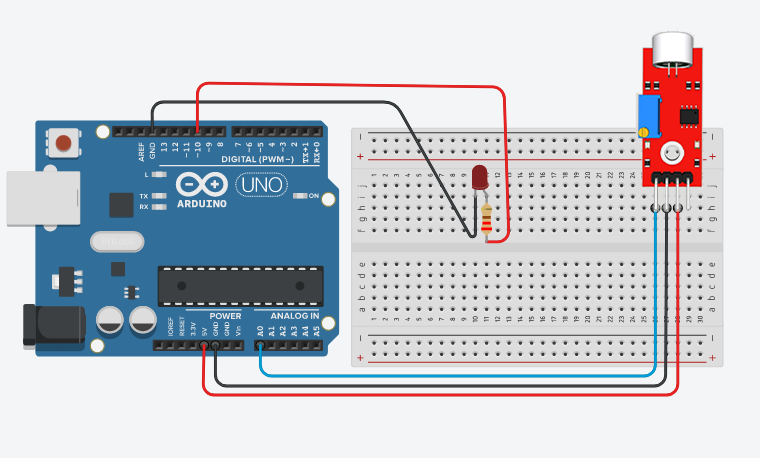
Circuit diagram:
Programming Code:
int Sensor = A0;
int clap = 0;
long detection_range_start  = 0;
long detection_range = 0;
boolean status_lights = false;
 // by www.andprof.com
void  setup() {
  // put your setup code here, to run once:
  pinMode(Sensor, INPUT);
  pinMode(10, OUTPUT);
}

void loop() {
  // put your main code here, to run repeatedly:
  int status_sensor = digitalRead(Sensor); // reads analog data from sound Sensor
  if (status_sensor  == 0)
  {
    if (clap == 0)
    {
      detection_range_start = detection_range  = millis();
      clap++;
    }
    else if (clap > 0 && millis()-detection_range  >= 50)
    {
      detection_range = millis();
      clap++;
    }
  }
  if (millis()-detection_range_start >= 400)
  {
    if (clap == 2)
    {
      if (!status_lights)
        {
          status_lights = true;
          digitalWrite(10, HIGH);
        }
        else if (status_lights)
        {
          status_lights = false;
          digitalWrite(10, LOW);
        }
    }
    clap = 0;
  }
}
Explanatory video: