


The development of electronics is now easier thanks to Arduino software (IDE), and Arduino boards (hardware). This set help to build digital and interactive devices with the help of other components. In Previous article we talk about Arduino boards. In this article we will recognize what is Arduino software (IDE), and how use it.
The Arduino software (IDE) is an open source software, which is used to programme the Arduino boards, and is an integrated development environment, devlopped by arduino.cc. Allow to write and upload code to Arduino boards. And it consiste of many libraries and a set of examples of mini projects.
Arduino software (IDE) is compatible with different operating systems (Windows, Linux, Mac OS X), and supports the programming languages (C/C++)
The Arduino software is easy to use for beginners, or advanced users. It uses to get started with electronics programming and robotics, and build interactive prototypes.
So Arduino software is a tool to develope new things. and create new electronic projects, by Anyone (children, hobbyists, engineers, programmers, … etc).
Arduino software interface:
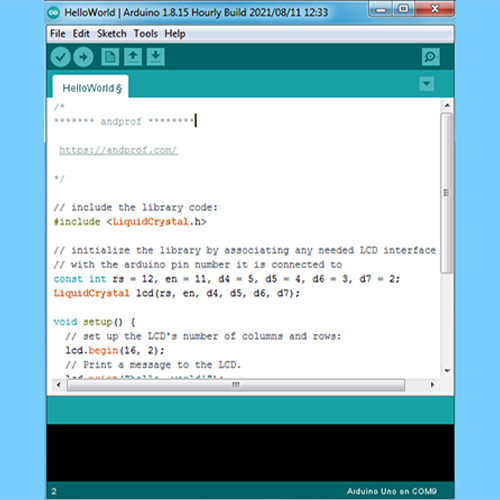
Menus section:

Menus are the main menus of the program, and they are 5 menus (File, Edit, Sketch, Tools, Help), and they are being used to add or modify the code that you are writing.
Toolbar section:
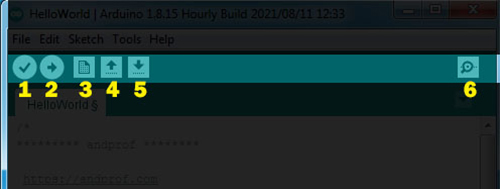
The toolbar is the most important section in the Arduino software, because it contains the tools that you will use continuously while programming the Arduino board. These tools are:
- Verify: this button use to review the code, or make sure that is free from mistakes.
- Upload: this button is use to upload the code on the Arduino board.
- New: this button use to create new project, or sketch (sketch is the file of the code).
- Open: is use when you want to open the sketch from sketchbook.
- Save: save the current sketch in the sketchbook.
- Serial monitor: showing the data which have been sent from Arduino.
Code editor section:
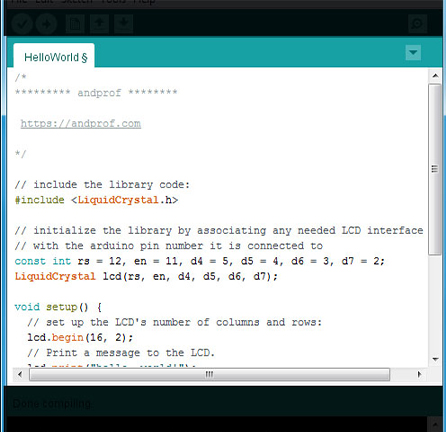
Code editor is liberator of codes, is the white space in the program, in which codes are been writing, and modifying on it.
Status bar section:
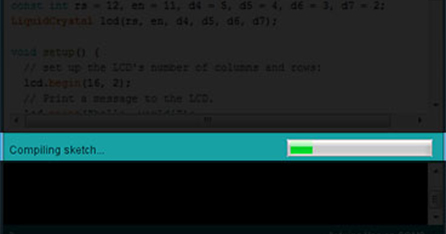
Status bar is a space can be found down the code editor, through it showing the status of operation’s completion (compiling, uploading, … etc).
Program notifications section:
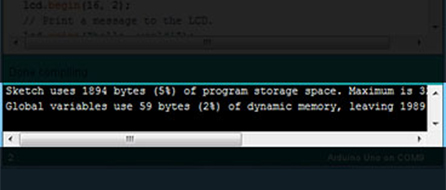
Program notifications this program showing you the mistakes of codes, and some problems that can be face you during the programmation process. And clarifies to you the type of the mistake or the problem which happened and it reason.
And it presents some instruction through it, which you have to apply to process the mistake or the problem.
Serial port & Board selections:
Serial ports selections is a space in which the program showing you the type of the port which is used to connect the Arduino by computer.
Board selections is a space in which the program showing you the type of the Arduino board.
How to use Arduino software:
After installation of electronic components by using input/output pins on Arduino board. We connect Arduino board with computer by USB cable, then we open Arduino software.
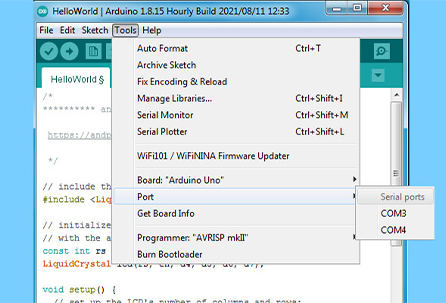
First thing: in the menu we click on “Tools”, then we click on “Board” and we select Arduino board which you are using.
Second: in the menu we click on “Tools” again, we click on “Port” and we select Serial port that we connected Arduino board with.
Third: in “Code editor” we write the programming code, then we click on “Verify” to verify it correctness.
Fourth: we click on “Upload” to upload the code on the Arduino board.
Thus, we have programmed the Arduino board using the Arduino program.


